Halloween is the perfect time of year to get crafty and creative with some spooky treats! Ditch the typical candy jar and use your DIY skills to make spider candy tin favors. These little treats will add a special touch to your Halloween party that everyone will remember for years to come. Follow these five simple steps to make adorable spider candy tins for your next DIY Halloween party!

Gather Your Supplies
For this DIY project you will need:
- 1 Piece of Black Fabric or Paper
- 1 Piece of White Fabric or Paper
- 1 Gold Favor Tin (1 tin per spider)
- 6 Black and White Party Straws
- A Pair of Scissors
- A Hot Glue Gun
- A Sharpie

Step 1: Make the Face
The first thing you’ll do is trace a hole on your black fabric or paper. To make things easy, you can use the insert of the tin to trace a perfect circle. Cut out the circle and then glue it to the top of the tin.


Step 2: Cut the Legs
Next you will cut your paper straws in half. And don’t forget to cut one end of each straw diagonally to create a spark edge! This will come in handy later when you glue on the legs.

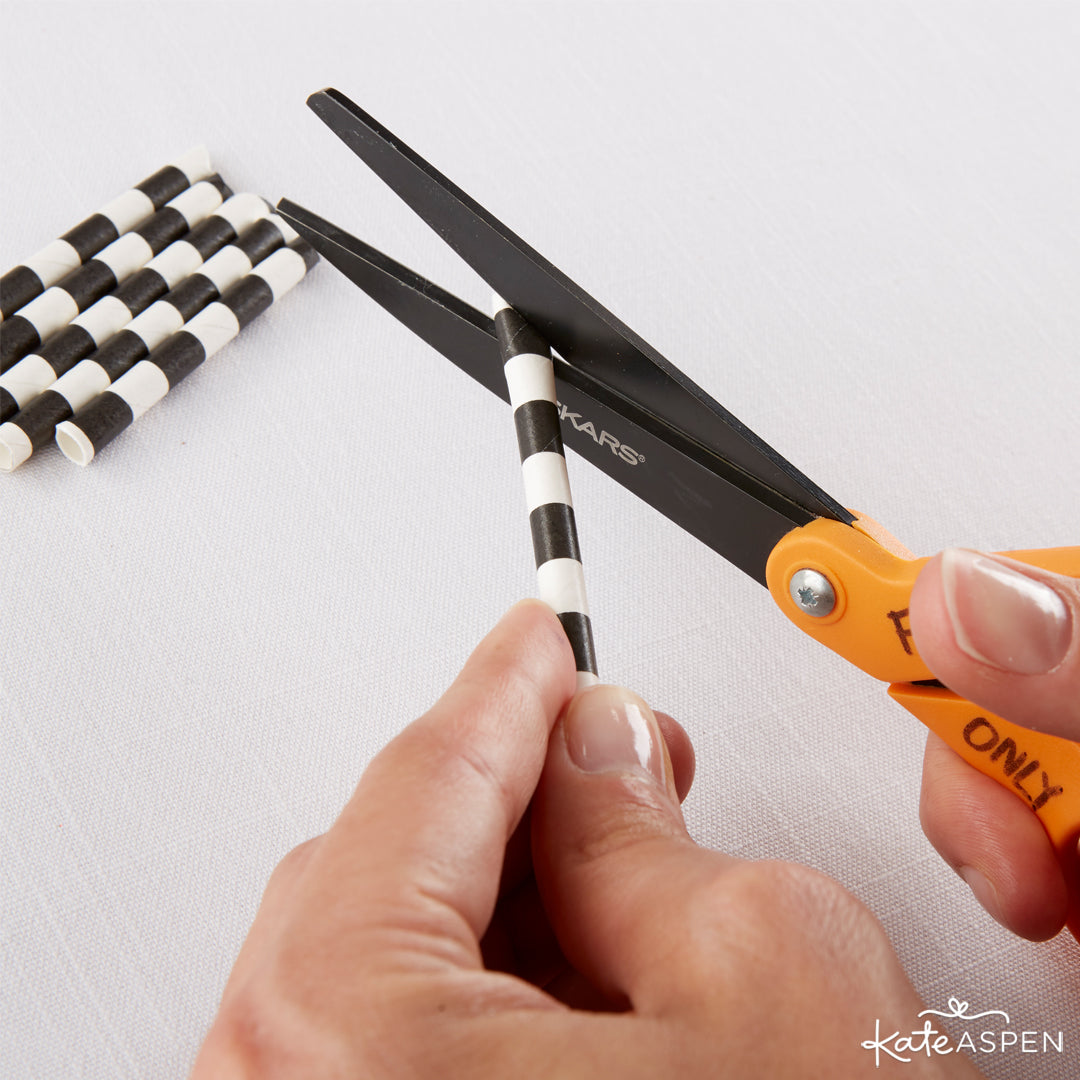
Take your straw pieces and bend them in half to create the spider’s “knees.” Then take the side of the straw that you did not cut diagonally and fold it in half to create a foot for the spider to stand on.

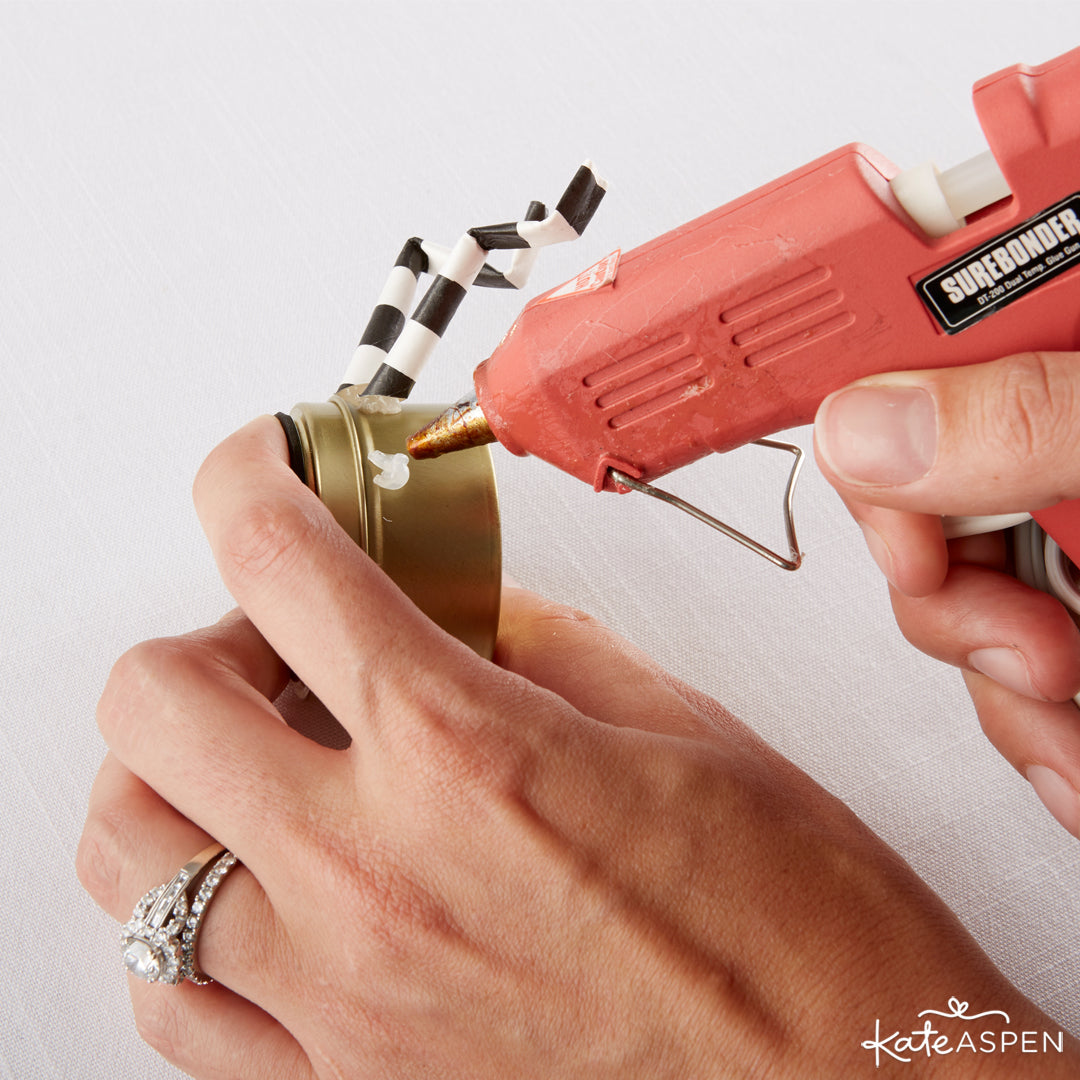
Step 3: Assembling the Spider
Now it’s time to give your spider some legs! Use your hot glue gun to glue the sharp edge of the legs to the tin. We recommend three straw legs on either side of the tin. Hold the legs to the tin for at least 15 seconds to make sure the glue sets correctly.

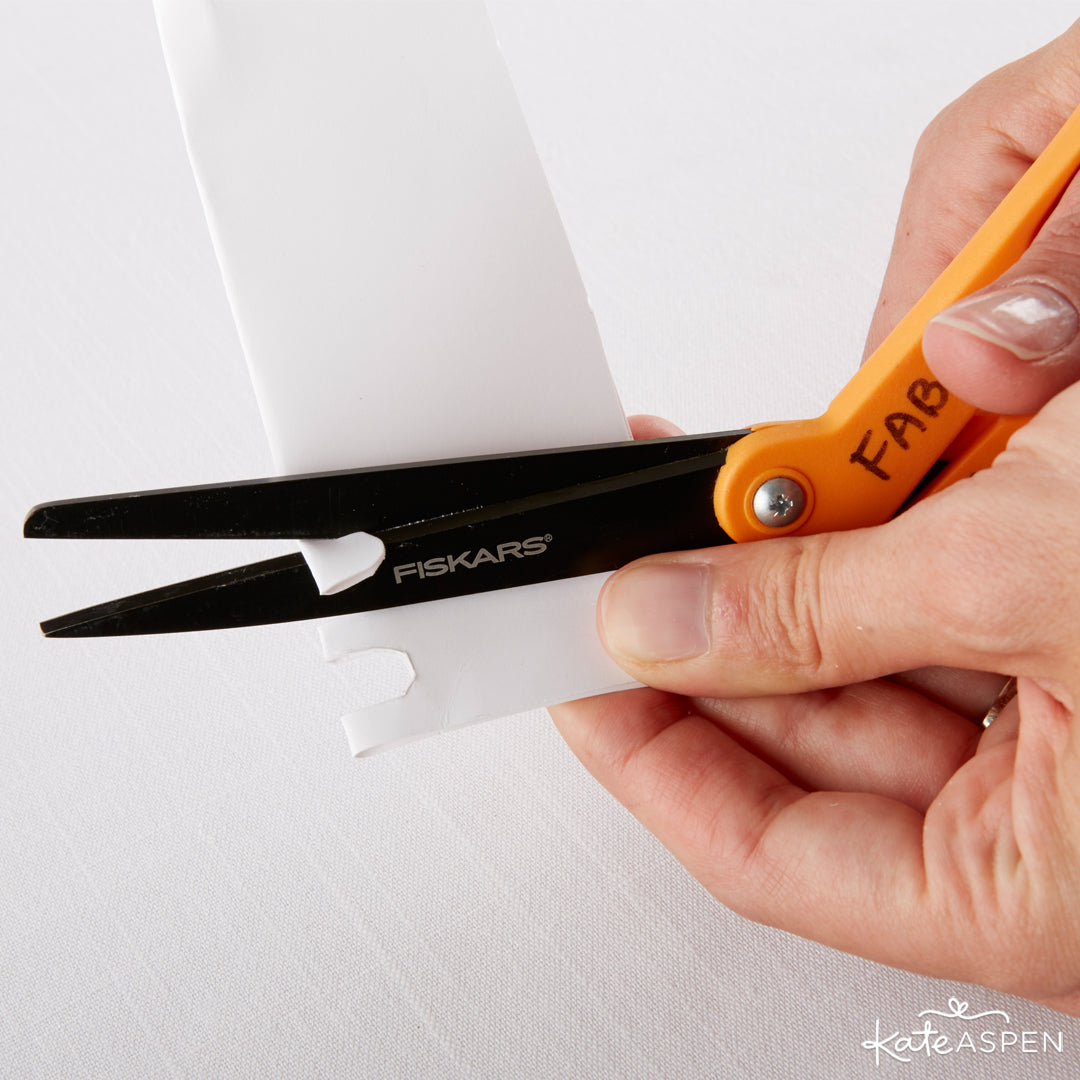
Step 4: Draw the Eyes
Fold a piece of paper in half to cut out a half circle or oval shape. Be sure to keep your oval small. Otherwise your eyes won’t fit on the tin!
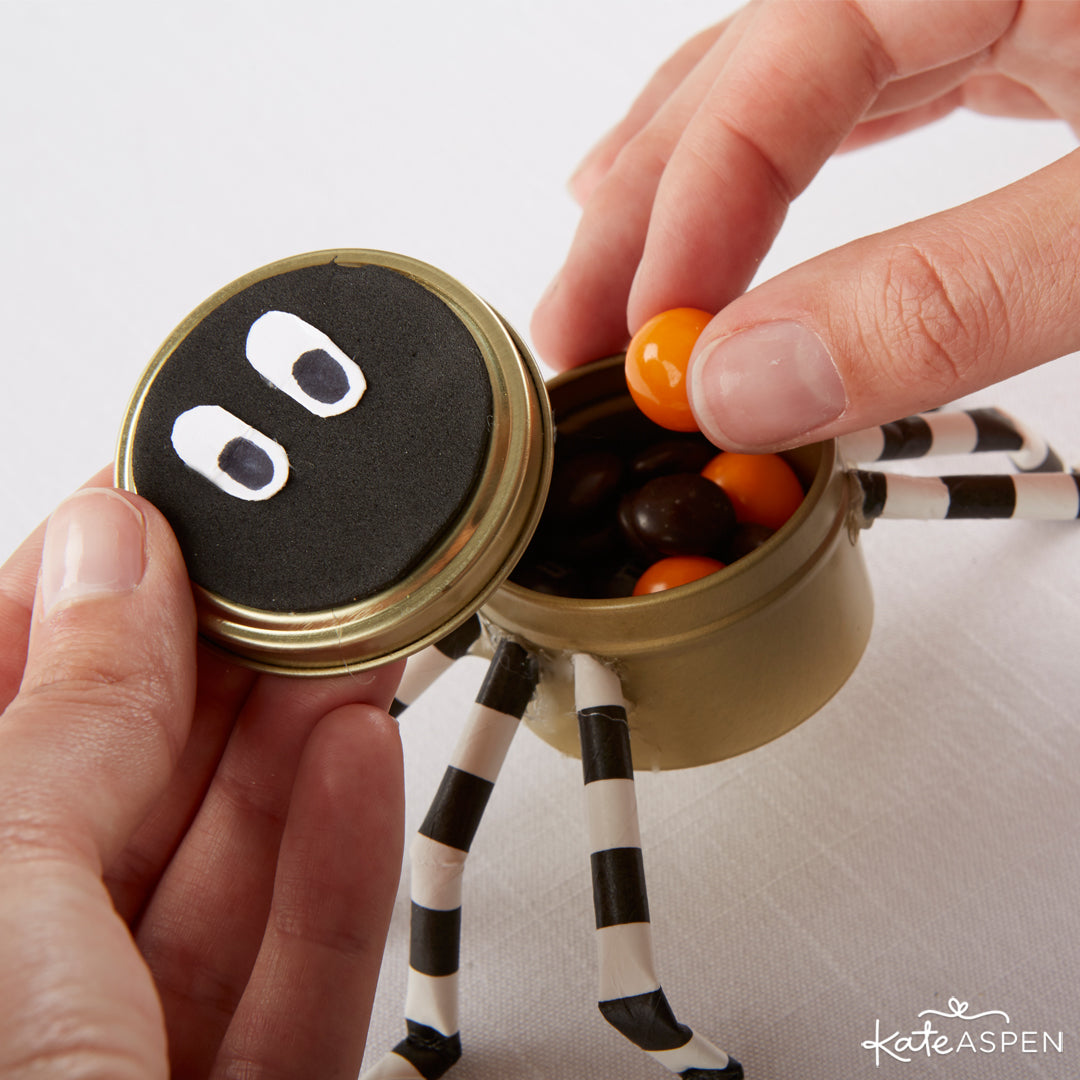
Unfold your paper halves and glue the pieces of paper to the spider. Draw black dots with a sharpie to complete the eyes.


Step 5: Enjoy!
Pop in some candy or small favors and you have yourself a unique Halloween treat for guests of all ages! These spiders are perfect for party decorations as well as memorable gifts for your guests to take home!

What special DIY touches are you putting together for Halloween? Tell us in the comments!
Happy Planning!